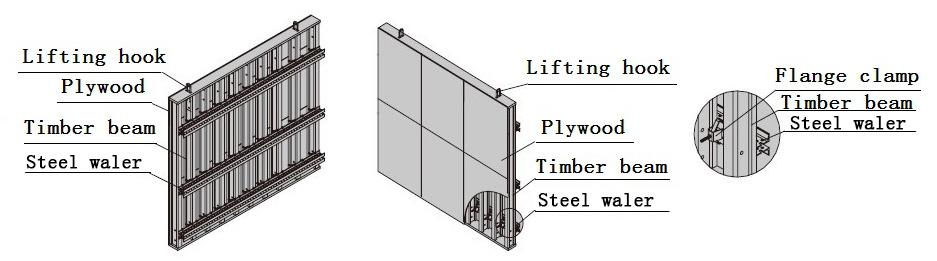
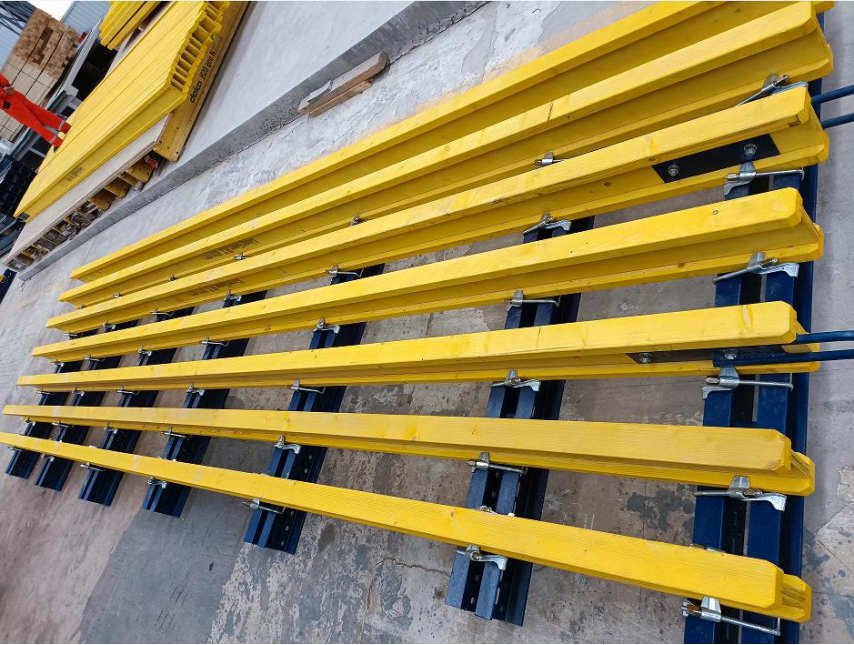
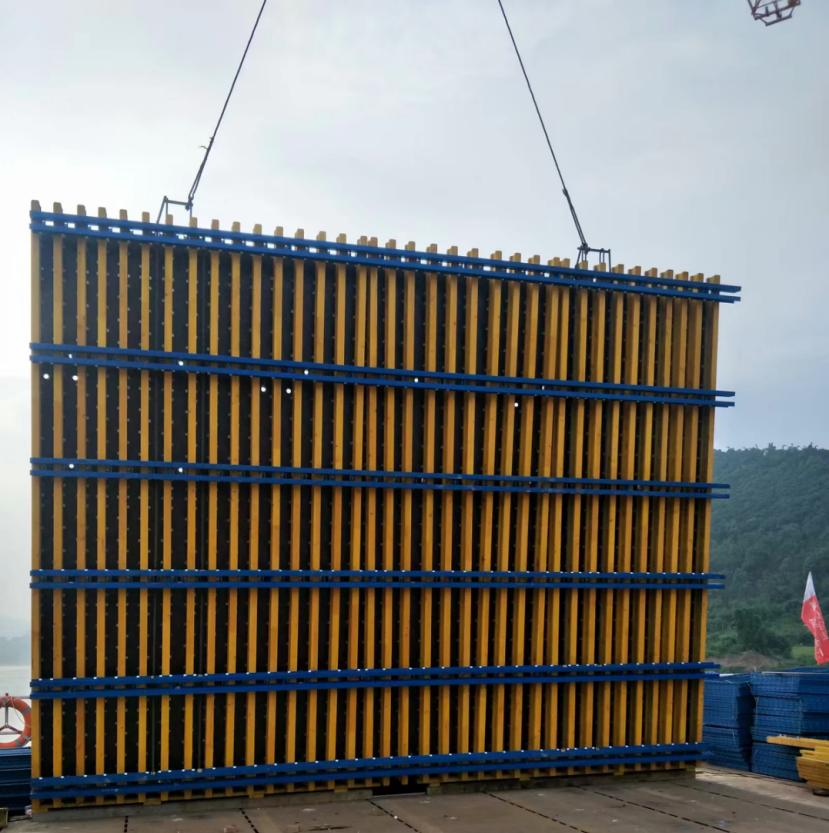
Lianggong H20 Timber Beam Formwork System is a modular, lightweight, and high-reusability formwork solution, composed of plywood panels, H20 timber beams, steel walers, flange clamps, and lifting hooks. Plywood and timber beams are fastened with self-tapping screws; steel walers and timber beams are connected by flange clamps. It features easy assembly/disassembly, smooth concrete finish, and wide applicability for walls, columns, piers, and dams.
1. Pre-Installation Preparation
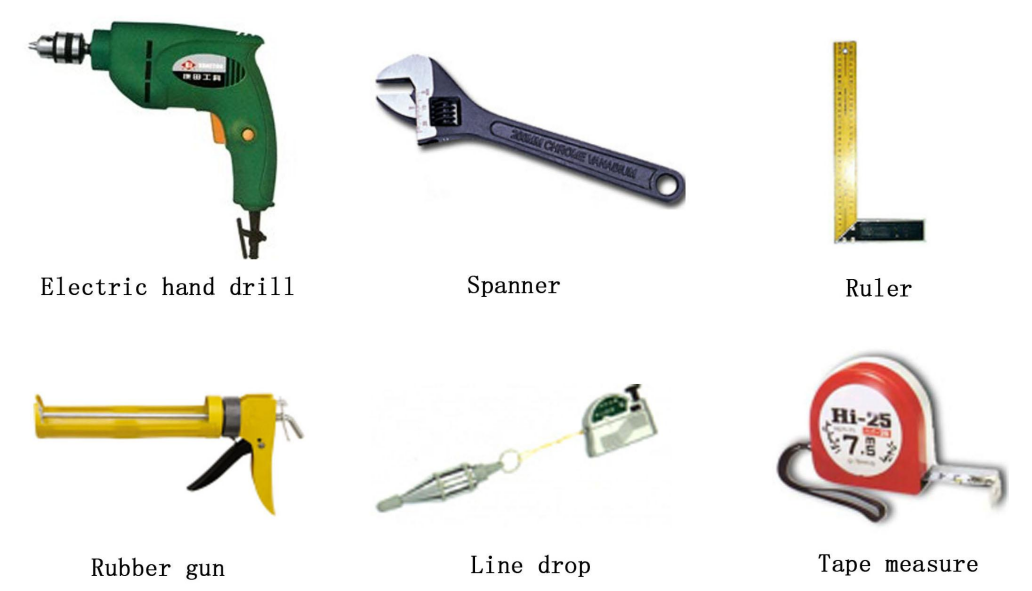
1.1 Assembly Tools
Prepare the following standard tools:
● Power tools: Electric hand drill, hole puncher, electric planer, electric saw, curve saw, carbide-tipped saw blades
● Measuring tools: Level, tape measure, angle square, straightedge, plumb bob
● Fastening tools: Screwdriver, spanner, glue gun, brad nailer
● Auxiliary tools: Paintbrush, pointing trowel, pencil, marker
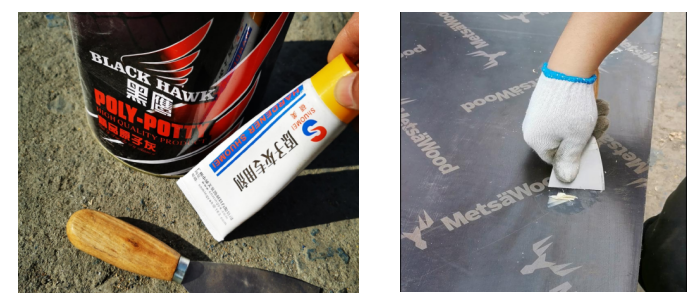
1.2 Auxiliary Materials
Self-tapping screws, iron nails, steel wires, silicone sealant, polyester putty, edge-sealing paint, release agent.
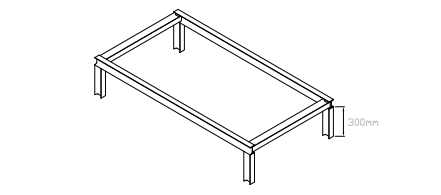
1.3 Assembly Platform
Construct a rigid platform at 200–400 mm height using I-beam or channel steel. Ensure the platform is flat, stable, and level to support accurate formwork assembly.
2. Formwork Assembly Procedure
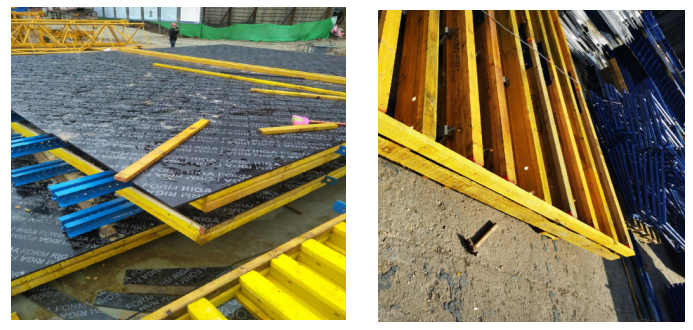
2.1 Layout and Positioning of Steel Walers
● Arrange steel walers on the assembly platform per design dimensions.
● Mark positioning lines on steel walers and check diagonals to ensure rectangular squareness (diagonals must be equal).
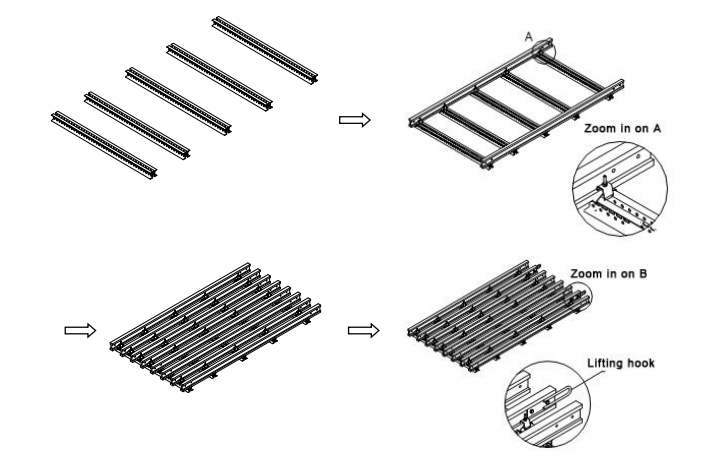
2.2 Installation of H20 Timber Beams
● Place one timber beam at each end of the steel walers; mark lines and verify diagonal equality.
● Secure beams to steel walers with flange clamps.
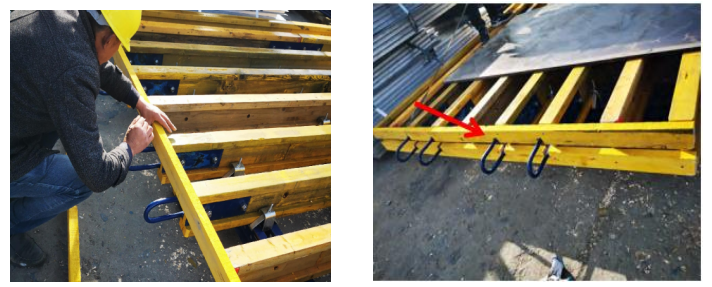
● Stretch a thin alignment line between the two end beams as a datum.
● Install intermediate timber beams parallel to the datum and fix each with flange clamps (stagger clamp orientation for uniform stress).
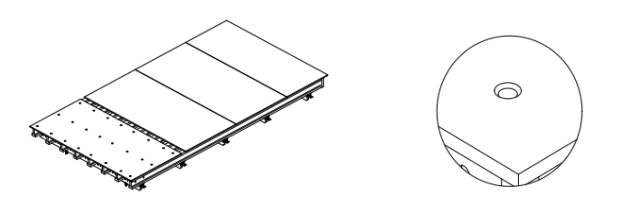
● For lifting points:
Select beams with web finger joints ≥1.5 m from hook holes.
Clamp the timber beam with a matching steel plate and lifting hook, then bolt securely.
● For backside self-tapping configurations: Pre-fix triangular supports at max. 400 mm spacing, ensuring they do not protrude beyond the beam flange.
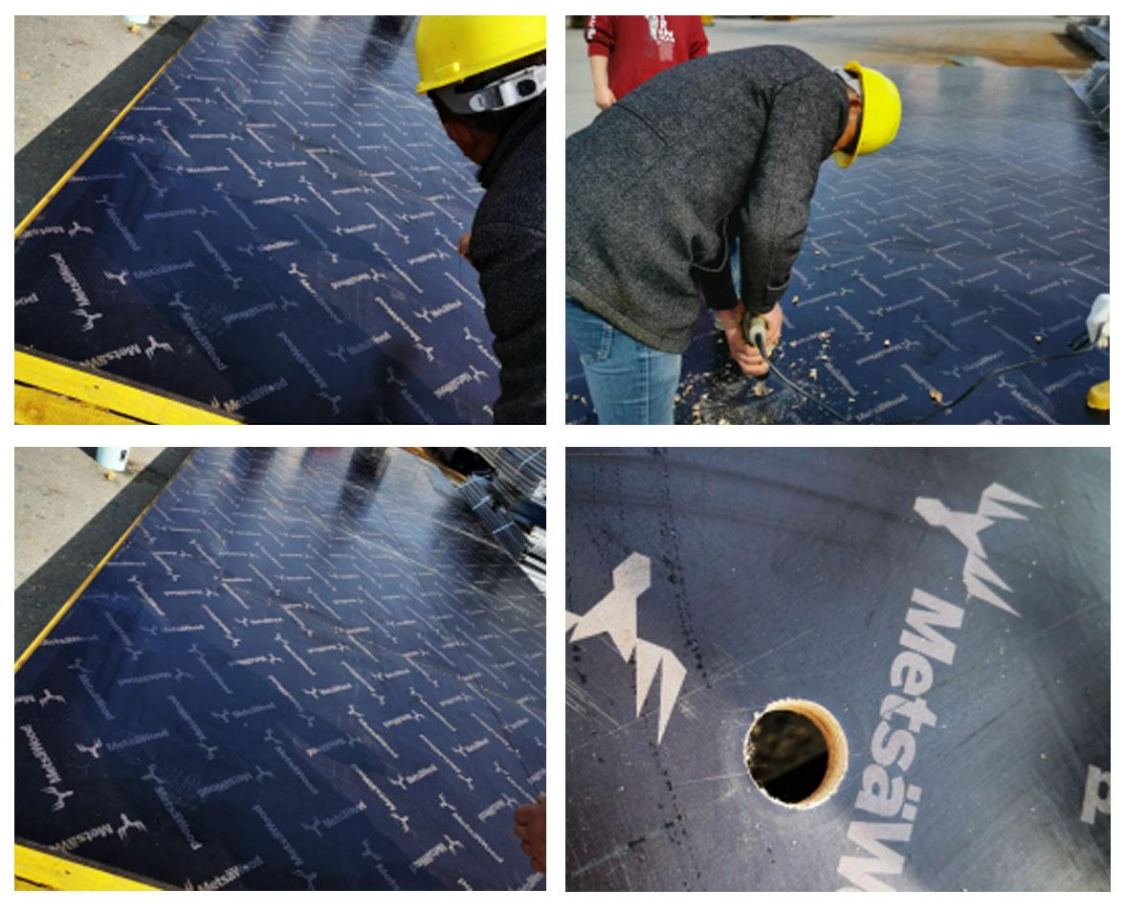
2.3 Plywood Panel Installation
● Lay out all plywood panels and verify dimensions.
● Drill pilot holes at panel corners and temporarily position with steel nails (shallow insertion).
● Drill full pilot holes; countersink the front end by 2–3 mm.
● Fasten panels to timber beams with self-tapping screws; remove corner positioning nails.
● For adjacent panels: Apply silicone sealant at joints and compress tightly to ensure watertightness.
● After full panel installation: Clean surfaces, fill screw heads with polyester putty, and smooth.
● Install end wood (4×8 cm) flush with beam edges; secure with 5×80 mm iron nails.
● Notch end wood at lifting hook locations.
● Cover panels with plastic film for temporary protection.
2.4 Drilling for Tie Rods / Anchors
● Mark hole positions per design using a level; control positional tolerance within ±2 mm.
● Drill vertically with a hand drill and proper punch to avoid inclined holes.
● Paint hole interiors and edges twice to prevent water absorption and edge swelling.
● Label each formwork panel with its drawing number to avoid misplacement.
2.5 Lifting of Assembled Formwork
● Use two steel wire ropes connected to crane hooks and formwork lifting points.
● Lift slowly; stabilize the formwork before moving to the installation location.
● Lower gently, temporarily secure, then release lifting rigging.
3. On-Site Installation & Alignment
● Clean panel surfaces with a medium-hard brush and cleaning agent; remove all dust and debris.
● Apply a uniform, thin layer of specialized formwork release agent (avoid waste oil or mixed agents). Reapply after rain.
● Check for conflicts between reinforcement and tie rod/anchor locations; adjust reinforcement as needed.
● Weld positioning struts to reinforcement to control formwork spacing and concrete cover.
● Lift and position formwork; adjust verticality with a plumb bob or survey instrument.
● Install sleeves and tie rods; tighten nuts. Recheck alignment to meet pouring specifications (sleeves to extend ~20 mm beyond formwork back).
4. Formwork Removal
● Loosening: Loosen tie rods by 1–2 threads when concrete strength reaches 6 MPa.
● Full removal: Dismantle formwork when concrete strength reaches 10 MPa.
● Sequence: Remove tie nuts → extract tie rods → remove core belts → back off or lift formwork.
● For anchored systems: Remove mounting bolts first.
● DO NOT pry or drag panels; use crowbars only on rear steel supports.
5. Operation, Maintenance & Precautions
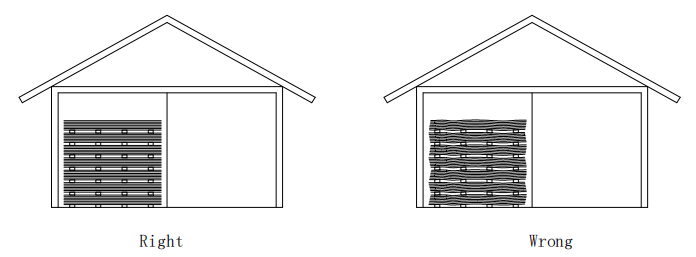
5.1 Storage
● Store in ventilated, dry, shaded areas; protect from rain and direct sunlight.
● Stack securely (max. 3 packs high).
● Remove packaging steel straps for long-term storage (>2 weeks) in hot/humid environments to prevent edge indentation.
5.2 Cutting & Processing
● Cut along wood grain for best results; cross-cut with carbide-tipped blades at ≥4000 r/min.
● Lightly sand edges; preserve surface film.
● Seal all cut/drilled edges twice with acrylic-based paint for durability.
6.3 Panel Joints
● Leave 0.5–1 mm gap at panel joints to accommodate moisture expansion.
● Use sponge tape or silicone at intervals for joint transition.
5.4 Fastening Rules
● Pre-drill pilot holes; keep screws ≥20 mm from edges and ≥25 mm from corners.
● Apply epoxy resin or silicone before driving screws; leave 3–4 mm of panel unpenetrated.
● For high-quality finishes: Recess screw heads 2 mm and fill with putty.
● Avoid common nails for vertical or high lateral-pressure applications.
5.5 Concrete Vibration
Prevent vibrator heads from contacting formwork panels to avoid surface damage.
5.6 Cleaning & Protection
● Clean panels immediately after stripping; use water or compatible release agent.
● Use brushes for concrete residue; avoid steel shovels.
● Protect from long-term UV exposure to prevent film degradation.
Why Partner With Us?
Professional Manufacturing: Lianggong Formwork is a leading manufacturer with advanced production lines and over 10 years of experience in formwork systems.
Custom Solutions: We offer tailored formwork designs based on your project drawings and requirements.
Global Service: Fast delivery, technical support, and after-sales service cover over 50 countries worldwide.
Ready to enhance your construction efficiency with our Timber Beam Formwork System? Contact us today for a free quote and detailed technical documentation!
Contact Information
Company: Yancheng Lianggong Formwork Co., Ltd.
Website: https://www.lianggongformwork.com https://www.fwklianggong.com https://lianggongform.com
Email: sales01@lianggongform.com
Tel: +86-18201051212
Address: No.8 Shanghai Road, Jianhu Economic Development Zone, Yancheng City, Jiangsu Province, China
Post time: Apr-21-2026